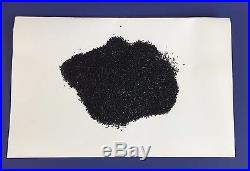
Replacement 2 CU FT Coconut Carbon Media for Whole House Water Filter Systems
Replacement 2 CU FT Coconut Carbon Media for Whole House Water Filter Systems


REPLACEMENT CARBON MEDIA FOR WHOLE HOUSE SYSTEMS. OR USE FOR REFILLABLE CARTRIDGES. Periodically, you are going to have to replace the media in your system. It may be years down the road if you have a new one, but you might want to know how. It’s fairly easy to do, and a great DIY project. It’s not rocket science! If you have an older system that is not performing like it used to, it is time to change the media. They last much much longer than that, unless you’ve abused it, or the threads are damaged, it is generally not an item that needs to be replaced. Do inspect it carefully though. The two things that can go wrong is, as we mentioned, media that is exhausted, or your control valve is malfunctioning. First of all, turn on the water by-pass valve on your system so that you can work on it. You will want to relieve the water pressure still in the unit, turn the control to “backwash” for 30 secs, so the system purges some water and pressure. There should be no water coming out of the drain after the first few seconds if your by pass valve is on. Put the control back into service mode. Unplug the electricity, remove the pipe fittings to your unit. Once your filter is free from your plumbing, unscrew the control valve. You will probably need someone to hold the unit while you unscrew it. Once it unscrews, you will notice that it is attached to the distributer/riser tube. This tube is attached to the control valve by an o-ring, so pull up on it. If the tube comes up with it, don’t worry, just grab on to it and separate them. Put the control valve away from where you are working. You don’t want to get media or dirt into it. The unit is heavy with water and media. You may want to move it, in which case, siphon the water out. If your distribution/ riser tube is not too far out of the tank, insert a lenght of hose down the tube to siphon out the water. With the tank now considerably lighter, pull out the distributor/riser tube and dump out the old media and dispose of properly. Clean out your media tank. Wash it with a bleach solution. If your media needed to be replaced because of fouling, this is especially important. Don’t forget to clean the distributor/riser tube as well. Once it’s clean and dry, we are ready to rebuild. Center your distributer/riser tube in the tank. There is a shallow indentation at the bottom of the tank it fits in. The bulb part goes in the bottom! Cover the opening of the distributer/riser tube with a plug or a piece of plastic securely rubber-banded to the tube. You DO NOT want any of the media in that tube, it will find it’s way into the control valve and cause it to malfunction. Now you are ready to rebed the filter. Use a funnel and add the media to the tank. Keeping the distributer/riser tube centered. It may be easier to add it slowly, rather than pouring it directly from the heavy bag. The media is never the entire depth of the tank, there is always at least half to a third empty space to provide plenty of room for backwashing. Some media like Filtersorb will be even less. When you’ve added all the media to the tank, clean off the protective cap/cover on your distributer/riser tube, and then remove it. Put a little food grade silicone grease on the O-ring in your control valve, the one that holds the distributer/riser tube in place. Insert the control head on to the riser tube and push down so it forms a nice seal. Screw the control valve back on, attach your plumbing, and plug in the control valve. Open a faucet down stream from the filter to purge the air that will be in the system from the newly rebuilt filter. Turn on the water S-L-O-W-L-Y to the filter, take your time. The water may be discolored, especially if it’s carbon that you’ve replaced. The purging air will be noisy… Don’t freak out! Once all the air is purged, let it sit for a few hours or overnight. It’s OK to keep using water during this time, you’ll see some discoloration, but it’s just aesthetics. Now it’s time to put it through a back wash cycle to remove media dust, and if it’s softener media or other media that needs to be regenerated, this is the time to do it. Make sure you have a faucet opened downstream in case there is still some trapped air in the system. Put the filter through an entire cycle to clean it all up and to regenerate. With a carbon filter, there will still be some residual carbon fines in the water for a few days after a backwash, again, that’s normal. Make sure the valve is working correctly and there are no leaks. Personal checks may be held until cleared. Thank you for your understanding. International Buyers Please Note. We do not mark merchandise values below value or mark items as “gifts” – US and International government regulations prohibit such behavior. The item “Replacement 2 CU FT Coconut Carbon Media for Whole House Water Filter Systems” is in sale since Sunday, June 12, 2016. This item is in the category “Home & Garden\Kitchen, Dining & Bar\Small Kitchen Appliances\Water Filters”. The seller is “waterprousa” and is located in Corona, California. This item can be shipped to United States.
- Brand: Water Pro Shop
- Country of Manufacture: Thailand
- MPN: Does Not Apply
